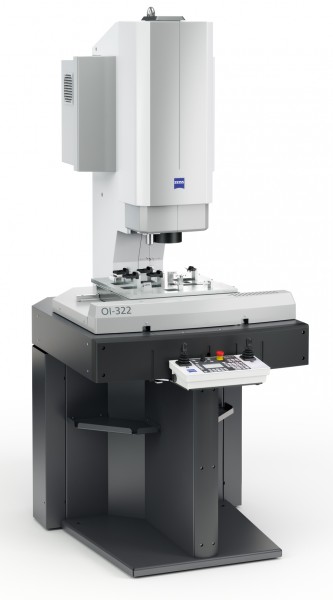
Small Yet Large – The New O-INSPECT 322 Coordinate Measuring Machine
The O-INSPECT line from Carl Zeiss is growing: the O-INSPECT 322 coordinate measuring machine is now available. It is the smallest system with which Carl Zeiss is expanding the range of applications of its coordinate measuring machines. The system unites contact ZEISS scanning and optical measuring. This combi- nation is now available in two sizes: O-INSPECT 322 and the original O-INSPECT 442. Both machines use the same sensors and function; the difference is in the measuring range.

Photo: Carl Zeiss IMT GmbH
In many industries, the parts being inspected are no bigger than a hand, e.g. a mobile phone case or dentures. The O-INSPECT 322 is now available for the measurement of these parts. The measuring range is somewhat smaller (300 x 200 x 200) mm, but the system is also more affordable compared to other O-INSPECT machines. “This machine is an ideal addition to our existing portfolio and further expands our range of appli- cations,” says Dr. Dietrich Imkamp, who is in charge of Visual Systems & CT at Carl Zeiss Industrial Metrology. Compared to pure optical measuring systems, O-INSPECT 322 has a competitive price and comes standard with contact sensors – and ZEISS scanning. The optical and contact sensors are built in: easy-to-use CALYPSO 3D CAD software merges the measured data.
3D measurements and scans with minimal probing forces
Where other machines can only offer single-point scanning and thus relatively high probing forces, O-INSPECT 322 from Carl Zeiss IMT offers scanning as a standard feature, in which the VAST XXT probe enables precision probing with forces in the millinewton range. Therefore, true 3D measurements that permit form and position statements are possible. This is a key benefit for users because most precision parts or plastic workpieces are three dimensional.
Telecentric optics are very elaborate and therefore not used on most optical measuring machines. Unlike the central perspective principle, the distance to the object is irrelevant in telecentrics: test objects in the camera image can always be measured with the right imaging scale. O-INSPECT 322 comes standard with the 12x telecentric zoom lens from Carl Zeiss Microscopy, which compensates for these deviations with an additional zoom range.
Precision even in challenging production environments
O-INSPECT 322 also works reliably under varying ambient temperatures. Where other machines need climate-controlled measuring labs, O-INSPECT delivers reliable measuring results at a wide range of temperatures and can also be deployed on the shop floor. Other configurations will be available in the future, which will tolerate temperatures up to 26 or 30 degrees Celsius thanks to TVA (Temperature Variable Accuracy). The operator always knows the tolerance range to be expected of the measured values. O-INSPECT 322 is therefore ideal for locations with difficult climate conditions.
Visit the online stand of Carl Zeiss Industrial Metrology on EXPO21XX.com
News Categories
- » NEWS HOME
- » Automation & Robotics
- » Industry 4.0
- » Material Handling
- » Sensors
- » Quality & Testing
- » Machine Vision
- » Laser & Optics
- » Metalworking
- » Motion Control & Drives
- » Hydraulics & Pneumatics
- » Process Industry
- » Renewable Energy
- » Agriculture
- » Home & Office Furniture
- » Environmental Tech

