
- Offer Profile
- Founded in 1993 as HAPEG GmbH by Martin Münker for CT-Service, today with more than 25 years of experience in the development and implementation of industrial computed tomography systems, Diondo is leading manufacturers and service providers in the field of innovative system solutions and software solutions for non-destructive material testing and metrology in the global market.
Due to our CT Scan Service that includes everything from Micro CT up to Linac CT, our customers benefit from an equally broad as well as profound application knowledge. This and an extensive, constantly expanding kit of components and function modules ultimately lead to innovative CT and DR systems for non-destructive, complete and true to scale examinations of the inner and outer structures of any object.
diondo dx Industrial Computed Tomography and X-Ray Systems

-
Non-destructive, complete and true-to-scale examination of the inner and outer structure of test objects - this describes industrial computer tomography (CT). In the industrial sector this leads to two main applications: Testing and measuring. Compared to other test methods, CT allows the spatial assignment of the defect and the exact determination of its size, largely independent of the material, even if the test object has a very complex structure.
Typical applications include examinations on plastics, metals, ceramics and fiber composites. By now, renowned institutes, large automotive companies as well as leading suppliers of the automotive and aerospace industry are among the customers of diondo. diondo dsubµ Sub-Micro CT System for Materials Research with the Highest Resolution
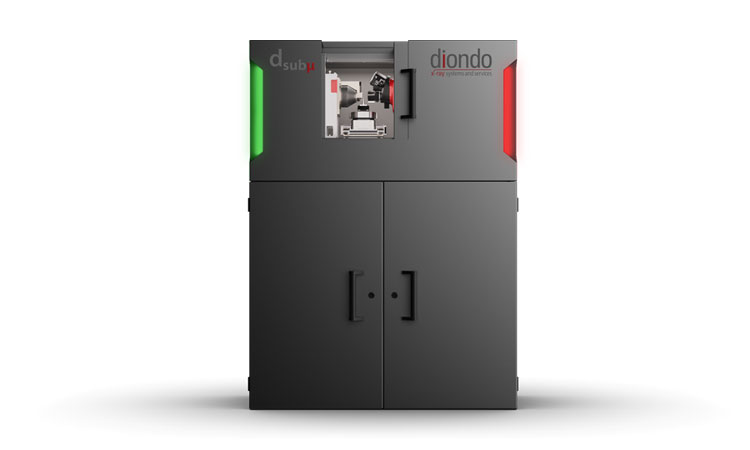
Sub-Micro CT System
-
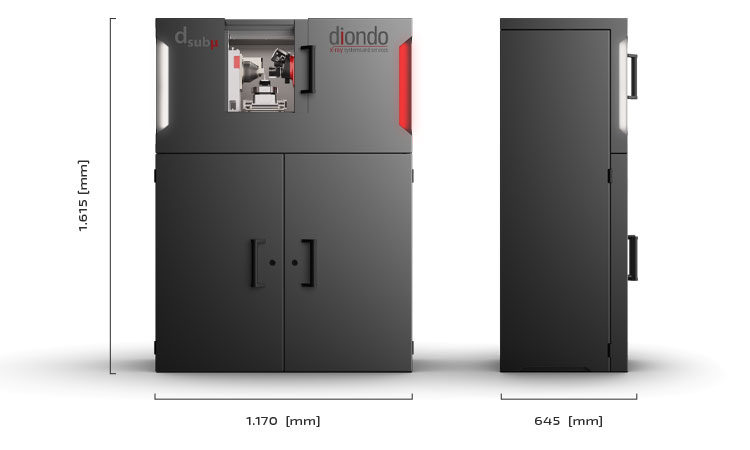
The compact Sub-Micro CT System has been developed for analyzing three-dimensional structures in materials research. The sub-µ-resolution captures the finest structures three-dimensionally, which are often to be found in connection with fiber-reinforced materials or organic materials.
Features- Innovative Detector System with three different fields of view and sCMOS camera
- Compact Design due to the integration of the entire periphery
- High-Precision Manipulator due to piezo-based linear axes and air bearing rotary axis
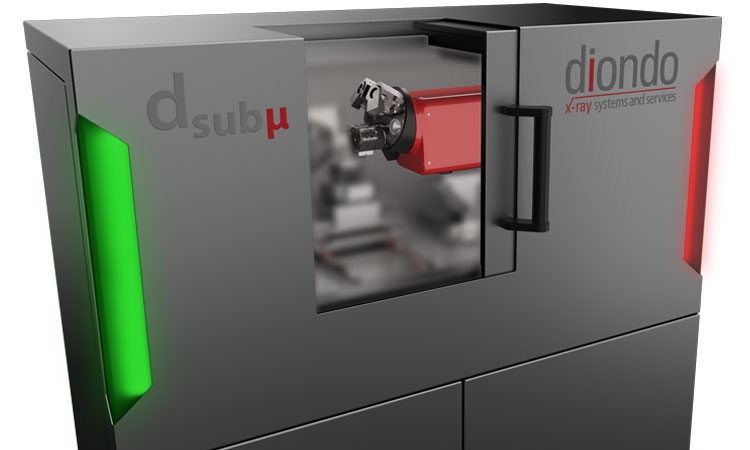
Indirect Detector System
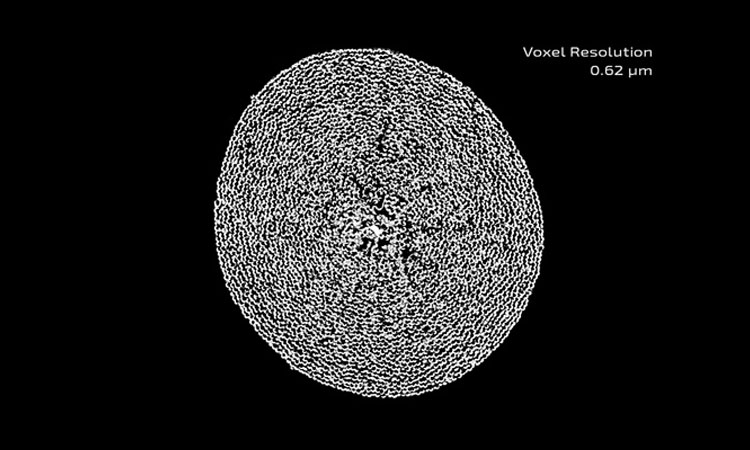
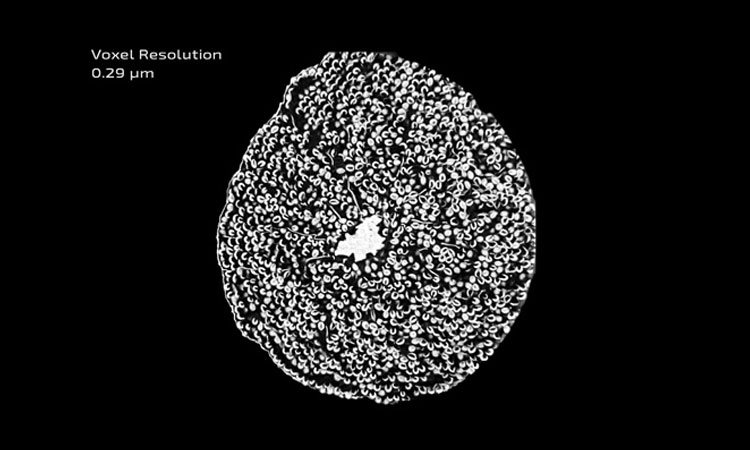
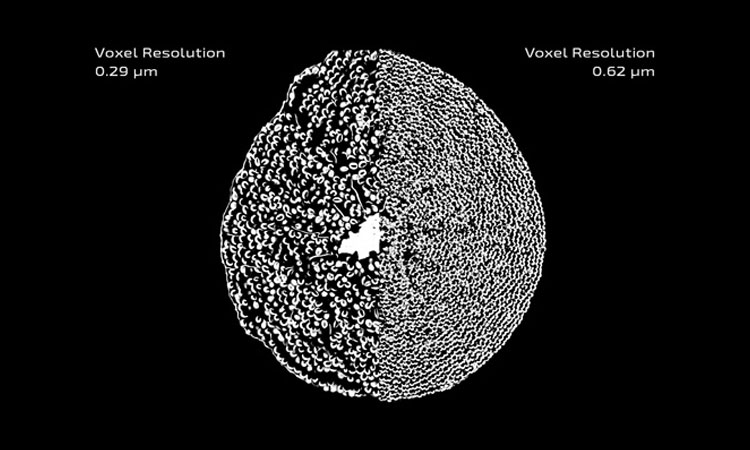
- In contrast to conventional Micro CT Systems, which work with high magnification, the Sub-Micro CT Systems owe their high spatial resolution to their innovative x-ray camera, which allows fully automatic switching between three fields of view. The smallest of them scans your samples with 0.3 μm/voxel and the largest captures a measuring volume of up to 5 mm (1.4 μm/voxel scanning).


Applications
- Nothing remains hidden for these test methods
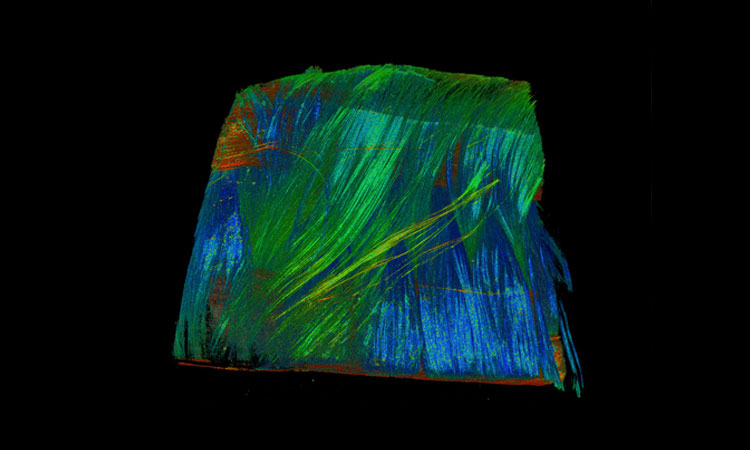
With a maximum voxel resolution of 300 nanometers they are particularly suited for the three-dimensional analysis of micro structures. The main areas of application lie in materials research, in particular for lightweight composite materials such as carbon fiber and glass fiber composites in order to determine the density and/or the spatial orientation of the fiber. Other areas of application are metal alloys (phase fractions and shape within the metal structure), metallic and organic foams (pore size and distribution), as well as natural materials such as wood, bone and stone.
Specifications
X-Ray Source 20-90 kV, max. 8 Watt Detector 4 Megapixel sCMOSChip, 6.5 μm Pixel Resolution Voxel Resolution [µm] 0,3 0,56 1,4 Optic 20 x 10 x 4 x CT Scan Field [mm] 0,62 1,2 2,8 Extended Scan Field [mm] 1,1 2,1 5,0 System Dimensions L 1.170 x B 645 x H 1.615 [mm] System Weight 890 [kg] Manipulation granite based, 6 piezo-based linear axes, air bearing rotary axis, ....
diondo d1
High Performance Micro-CT System
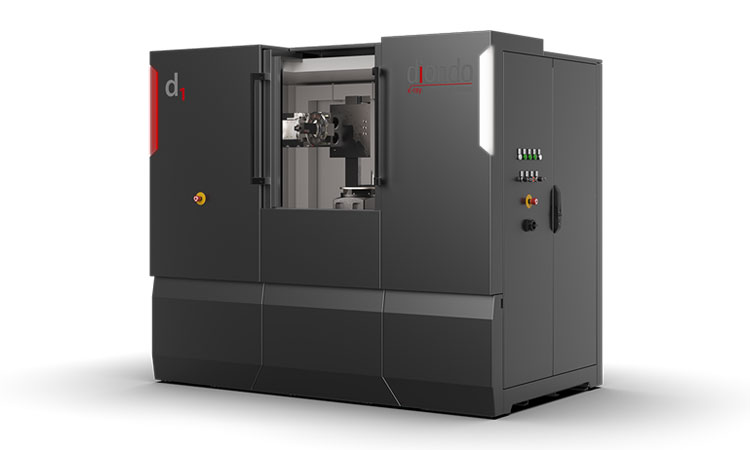
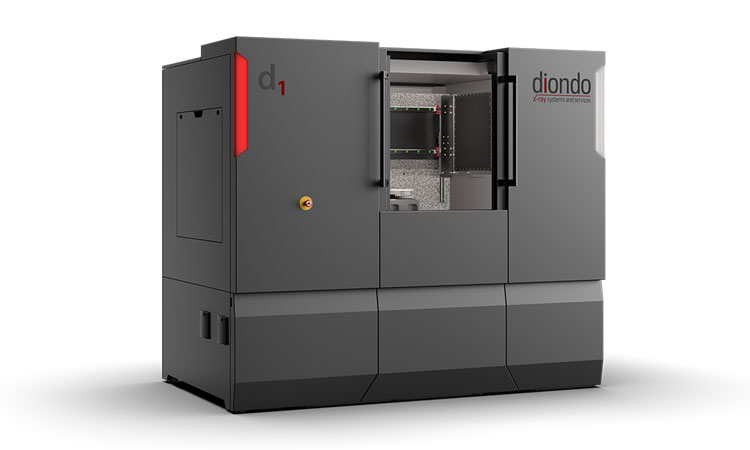
- The high-resolution micro-CT system diondo d1 has been perfected for the analysis and measurement of small-to-medium-sized components. By using a high-power transmission X-ray source, a fourfold higher resolution is achieved in the same measuring time compared to conventional systems. Alternatively, with the same resolution, the measuring time can be reduced by a factor of four. The extremely high transmission power also enables the analysis of challenging material combinations such as those used in electromobility applications, e.g. in the development of battery cells.
Highlights
- Breathtaking Resolution in an Eextremely Short Time
The high penetration power of the 240 kV transmission tube combined with the ultimate target power of 80 watts revolutionizes CT analysis in terms of resolution and scan time of challenging samples. - Maximum Inspection Volume for Highest Precision
The combination of a tightly-spaced pixel grid and an especially large active area enables both an extremely high resolution for the examination of small objects and the imaging of large samples in one scan. Multiple time-consuming partial scans at the expense of precision are avoided.
Further Highlights- High-Precision Granite Manipulator
Inherent rigidity and temperature stability guarantee highest precision even after many years of intensive use. - Coordinate Measuring Technology
Reproducible 3D measurement technology for highest demands according to VDI/VDE 2630-1.3 - Advanced scanning modes
including helix scanning for high flexibility
- Breathtaking Resolution in an Eextremely Short Time
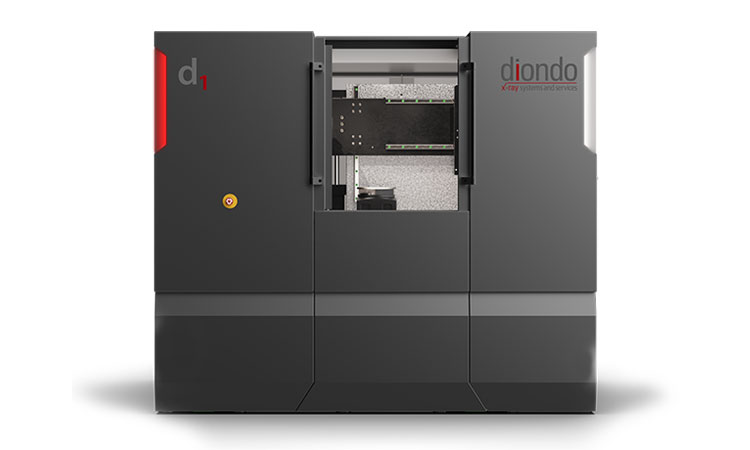
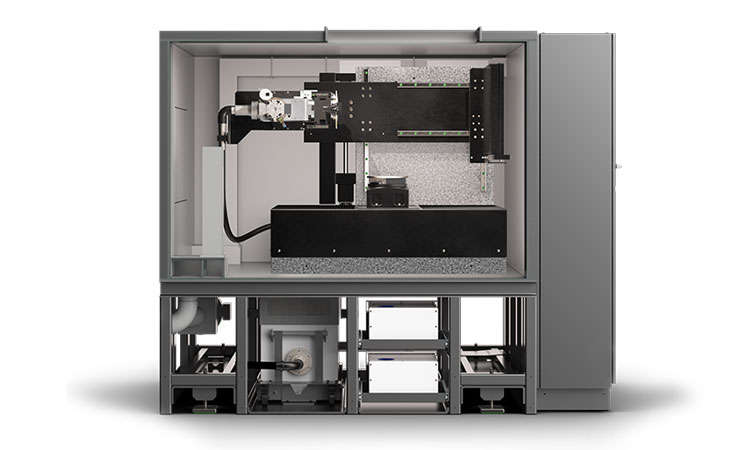


Intelligent Design
- Nothing remains hidden for these test methods
With a maximum voxel resolution of 300 nanometers they are particularly suited for the three-dimensional analysis of micro structures. The main areas of application lie in materials research, in particular for lightweight composite materials such as carbon fiber and glass fiber composites in order to determine the density and/or the spatial orientation of the fiber. Other areas of application are metal alloys (phase fractions and shape within the metal structure), metallic and organic foams (pore size and distribution), as well as natural materials such as wood, bone and stone.
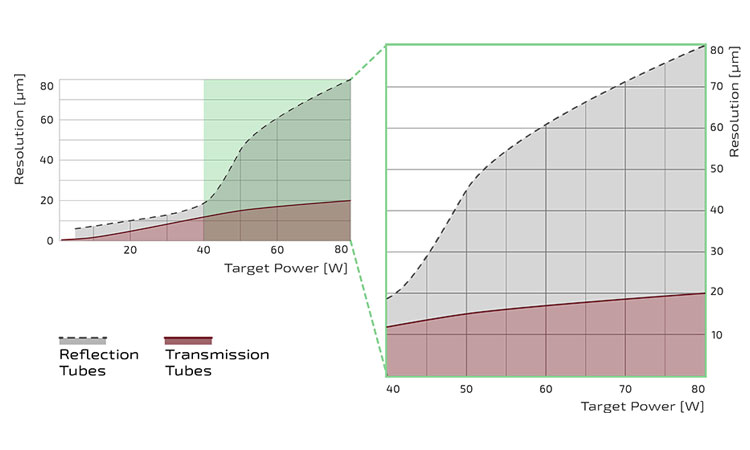
Microfocus X-Ray Tube (JIMA) Resolution as a Function of Target Power
- High-Performance Transmission X-Ray Source
The Best of Both Worlds
Classical CT systems work with reflection tubes as the radiation source. The high power required here to penetrate challenging materials or higher wall thicknesses in components has a negative impact on maximum resolution.
Simply put, the higher the power used, the lower the resolution. To counteract this phenomenon, lower power levels and the associated longer measurement times are used. This is not necessary with the diondo d1.
By using a high power transmission X-ray source, up to four times higher resolution can be achieved for the same measurement duration compared to conventional systems. Alternatively, the measuring time can be shortened by a factor of four for the same resolution, which is of great advantage not only for small series production.
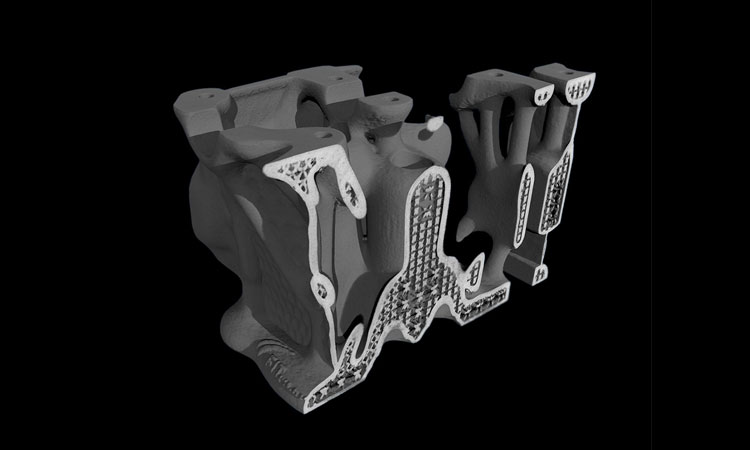


Applications
- Wide Range of Applications
Additive Manufacturing
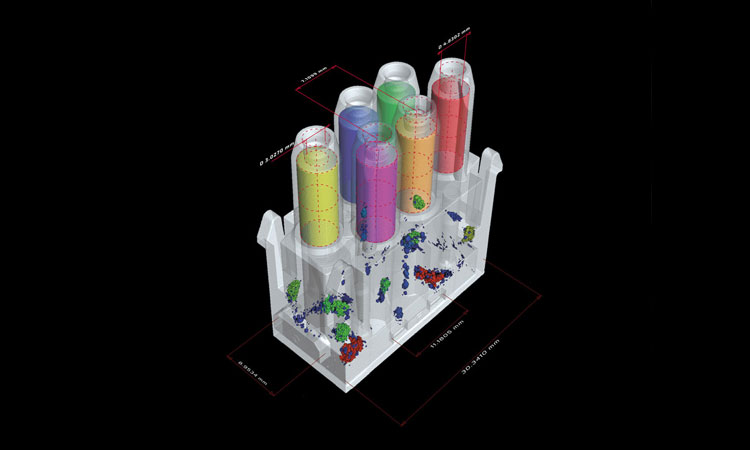
The d1 is ideally configured for addressing the inspection needs of precision additively manufactured parts for demanding applications in aerospace and automotive industries.
Materials Science (composites)
Despite the high specific strength of composites, premature component failure can occur due to various material defects, e.g. incorrect fiber orientation or impact damage. Non-destructive CT scans can be used to check components before returning them to service.
Metrology
Computed tomography can be used to perform numerous metrological tasks where other measurement systems reach their limits. Even optically challenging surfaces, e.g. transparent or polished surfaces and inaccessible areas can be measured rapidly without any problems at high resolution.
Specifications
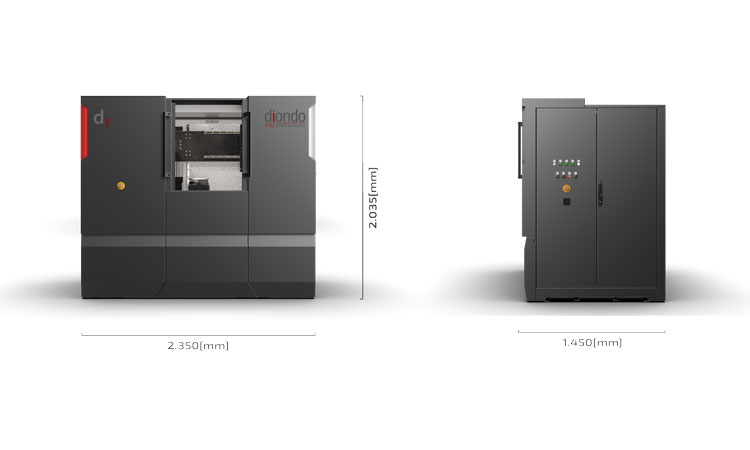
Transmission Tube 190 up to 240 [kV] Detector 3.000 x 3.000 px, 139 [µm] Focus-Detector-Distance 800 [mm], variabel Scan Volume à 300 x 230 H [mm] Scan Volume, maximal à 400 x 400 H [mm] Sample Weight 20 [kg] System Dimensions L 2.350 x B 1.450 x H 2.035 [mm] L 2.350 x B 1.450 x H 2.035 [mm] 5,5 [t] diControl Features DR-Function, Helix CT, Batch Mode, Offset CT, Daily Check, Health Monitor, Limited Angle CT, Metrology gemäà VDI/VDE 2630-1.3, uvm. Manipulation granitbasiert, 4/5 axes
diondo d2 Powerful Micro CT System for Small to Medium-Sized Components
Versatile Micro CT System
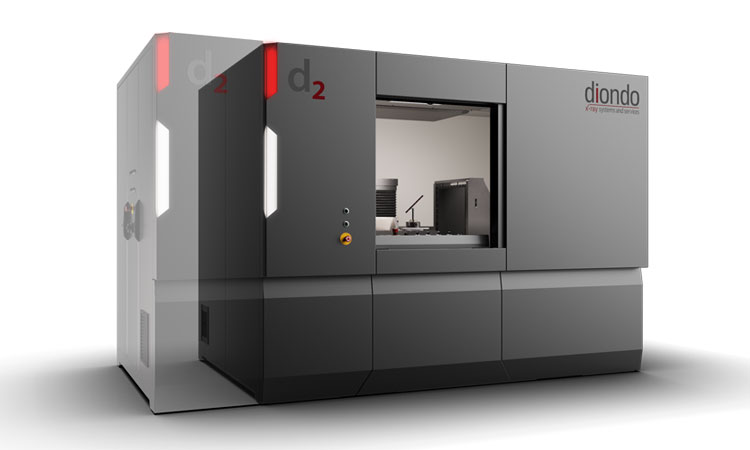
- The versatile Micro CT System diondo d2 has been optimized to analyze and measure tiny to medium-sized components. The broad range of applications includes everything from classical non-destructive analyses via high-precision metrological coordinate measuring technology in accordance with VDI/VDE 2630 1.3 up to production control accompanying series. Because of its great adaptability, the Micro CT System sets new standards in science and industry alike.
Features- High-Resolution 3D Analyses of materials with low density up to entire assemblies
- Brilliant 3K Detector for 30% higher detail detectability with extremely short measurement times
- Optional Dual-Tube Configuration Micro Focus & Nano Focus tubes up to a maximum of 300kV guarantee excellent material penetration
- Multi-Axis Granit Manipulator with infinitely variable distance between focus and detector for maximum resolution
- Numerous Function Modules for autonomous measuring operation, in situ analyses and much more.
in situ Computed Tomography
-
Dimensional Measurement & Material Testing Under Specific Test Conditions
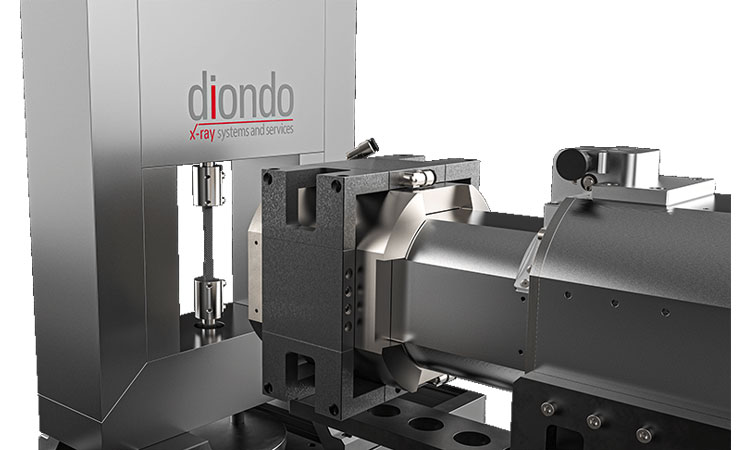
The diondo in-situ enhancements allow 3D visualization of test objects under the influence of tension, pressure, bending and/or temperature. Time-resolved thermal and mechanical testing e.g. of composite materials and additively manufactured components. The special design allows maximum flexibility and a resolution optimized for the size of the component.
- Available as tension/pressure unit of 1 kN up to 10 kN, as well as special solution of up to 50 kN.
- Available temperature module from -40°C to +200°C, as well as various special solutions for up to 1.300°C.
Applications
- Nothing remains hidden for these test methods
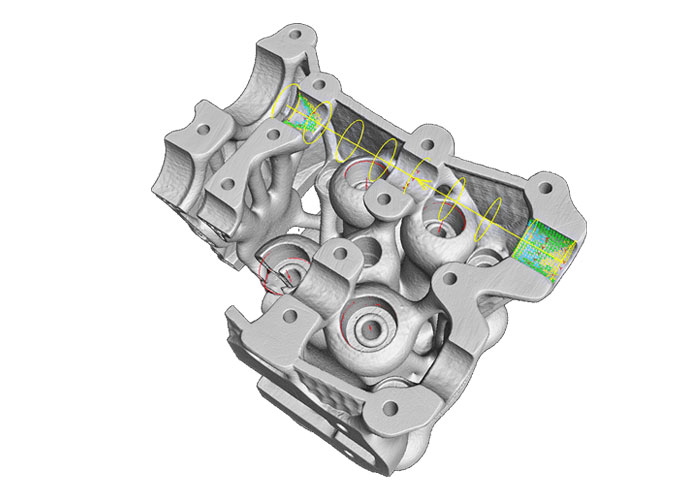
Three-dimensional measuring and testing of additively manufactured components, electro-mechanical assemblies, workpieces made of plastic [connectors, switches, housings, etc.], light metal cast components [pistons, housings, heat exchangers, etc.], composite materials [CFK, GFK] as well as high-alloy steels [valves, tensile specimens, etc.].
Industries- Automotive Industry
- Electronics
- Additive Manufacturing
- Science & Research
- Aerospace
- Material Science
- Medical Technology
- Plastics Processing
Specifications
-
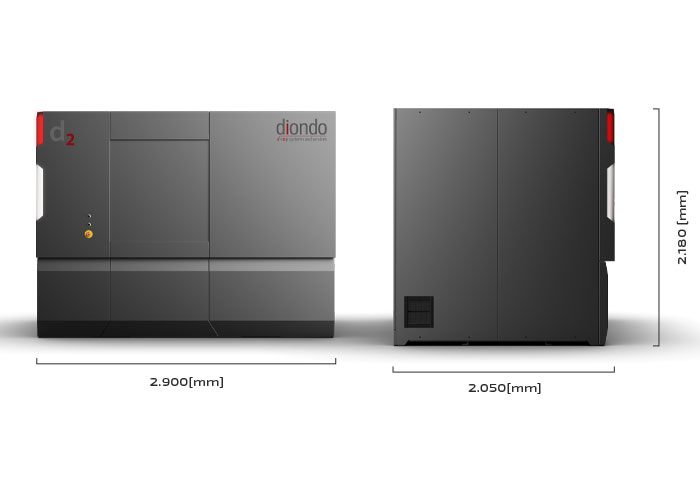
Reflection Tube 190 up to 300 [kV] Transmission Tube 160 up to 300 [kV] Detector 3.000 x 3.000 px, 139 [µm] Focus-Detector-Distance 400 - 1200 [mm], variabel Scan Volume à 320 x 265 H [mm] Scan Volume, vert. MKE * à 320 x 700 H [mm] Scan Volume, maximal à 520 x 650 H [mm] Sample Weight 50 [kg] System Dimensions ** L 2.900 x B 2.050 x H 2.180 [mm] System Weight 10,5 / 15 [t] diControl Features DR-Function, Helix CT, Batch Mode, Offset CT, Daily Check, Health Monitor, Limited Angle CT,
Metrology 5 µm +L /100, VDI/VDE 2630-1.3, uvm.Manipulation granite based, 5/6 axes
*MKE : Measuring Circle Extension
** Standard system 240 kV plus control cabinet
Customized adjustments are available on request.
Multi-Axis Granite Manipulator
- Multi-Axis Granite Manipulator
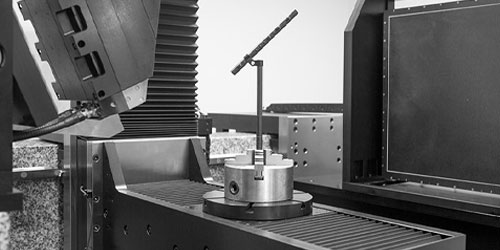
Up to six motorized axes guarantee great flexibility and the best resolution for the respective component size. Maximum long-term stability and high-precision positioning. The motorized, variable and infinitely adjustable distance between focus and detector allows very short measurement times at maximum resolution. This guarantees precise and reproducible 3D analyses of the inner and outer structures of complex objects.
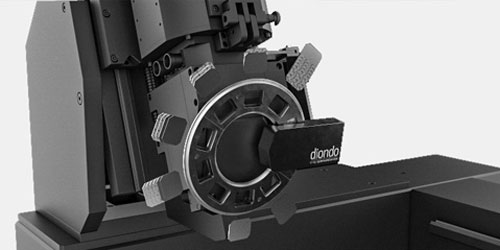
Motorized Filter Changer
- Comfortable and safe operation due to complete integration into the software interface. Up to nine different filter thicknesses / materials can be pre-configured. Allows the automatic exchange of filters during a sequence of CT measurements on different components. Traceability - filter strength and material are automatically logged.
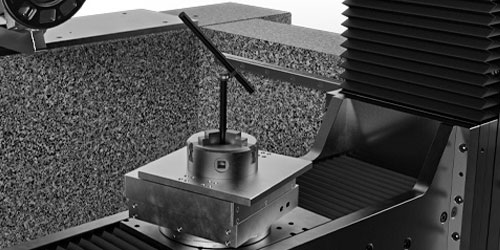
X/Y Table
- Allows very precise positioning of test parts across and along the direction of the beam, regardless of the rotation angle. For measurements and analyzes of large and/or heavy test parts. It can be dismantled without tools.
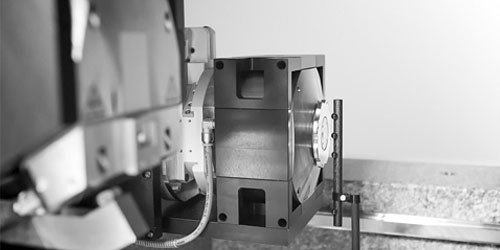
X-Ray Tube Configuration
- Nano Focus Transmission Tubes
- Variety of Nano Focus configurations up to a maximum of 300kV
- Nano Focus with a performance 3 times higher compared to customary Nano Focus tubes
- Water-cooled diamond target for maximum performance and highest stability of the focal spot
- Ultimate 3D CT resolution
- AIC - "Automatic Intensity Control" for continuous intensity of the x-ray radiation
Micro Focus Reflection Tube- Various Micro Focus Configurations up to a maximum of 300kV
- 350W reflection tube with active target cooling
- Active water cooling of the tube head for highest stability of the focal spot
- AIC - "Automatic Intensity Control" for continuous intensity of the x-ray radiation
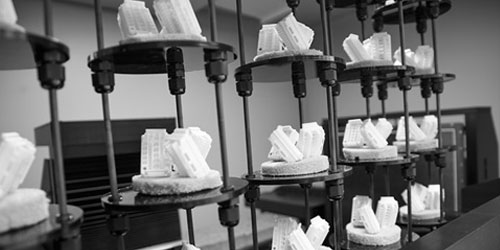
Automatic Part Changer
- Mounting Station with Automatic Part Changeover
- Maximize your throughput:
- Allows to scan multiple (different) test parts in a row.
- Expansion of the testing capacity:
After the set up of the CT scans the operator no longer needs to be present - night shifts and weekends can be used for capacity expansion without any additional staff. - Radiation protection:
The mounting station is located inside the cabin. Thus opening the lead cabinet without presence of the operator can be avoided. - No restrictions for classic single part tests:
For classic single part tests the mounting station can be moved in a space-saving parking position.
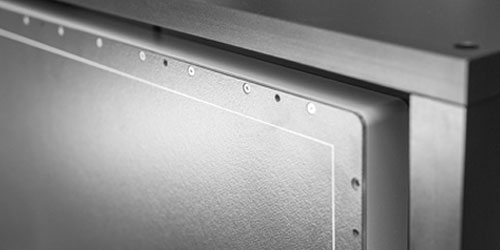
3K Flat Panel Detector
- Next generation industrial 3K flat panel detector
The extra large active surface allows analyzing large test parts and thus very often avoids the need to put together individual partial scans (stitching), which is necessary in case of smaller detectors.- 30% higher detail detectability in comparison to customary detectors
- High sensitivity for extremely short measurement times
- Optimized for a long life in industrial use
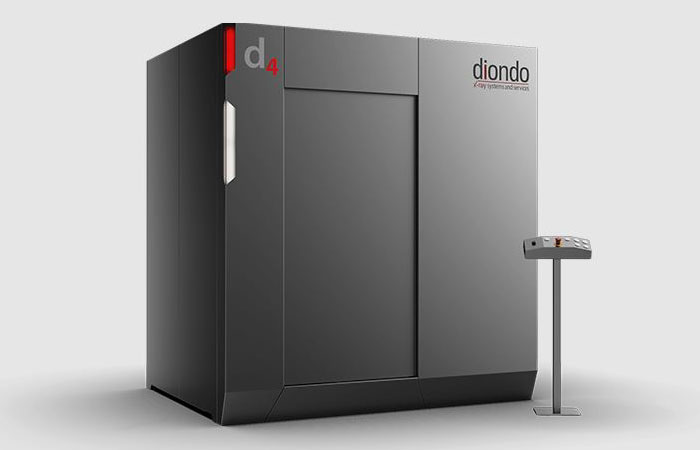
diondo d4 Compact Computed Tomography System for Medium-Sized and Large Components with Higher Densities
Features
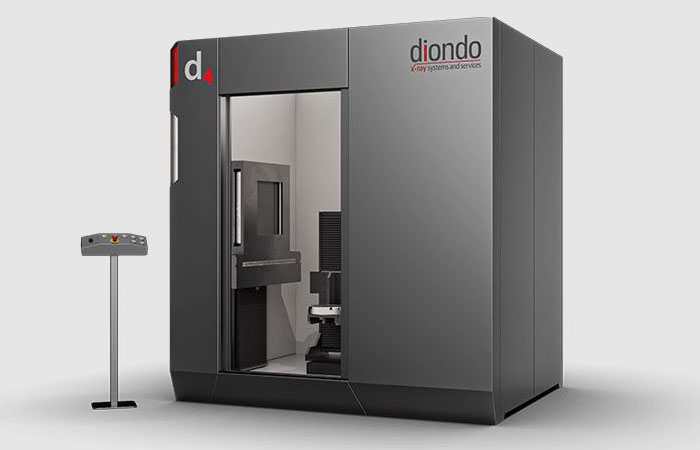
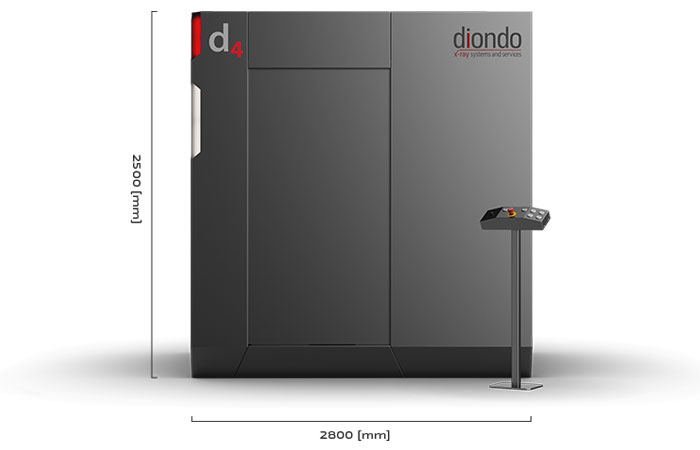
- The powerful computed tomography system diondo d4 has been optimized for high-resolution 3D measurements of medium-sized to large components such as cylinder heads or crankcases, but also for analyses of high-density test objects such as turbine blades. The small space requirement of the computed tomography system makes it easy to integrate into an existing production or laboratory environment. Due to its plug&play the system is ready for operation shortly after the installation.
Features- High-Performance Tubes up to 600 kV for sufficient power reserves even for highly absorbent test objects
- Compact Design due to the integration of the entire periphery
- Robust 3K Detector for higher detail detectability at short measurement times
Efficient Throughput
- Thanks to the combination of a high-resolution line detector and a large flat panel detector, the diondo d4 satisfies the highest demands concerning image quality as well as part throughput. Users benefit of innovative software functions such as diScatter, a filter technology to automatically reduce disturbing scattered radiation.
Applications
- Nothing remains hidden for these test methods
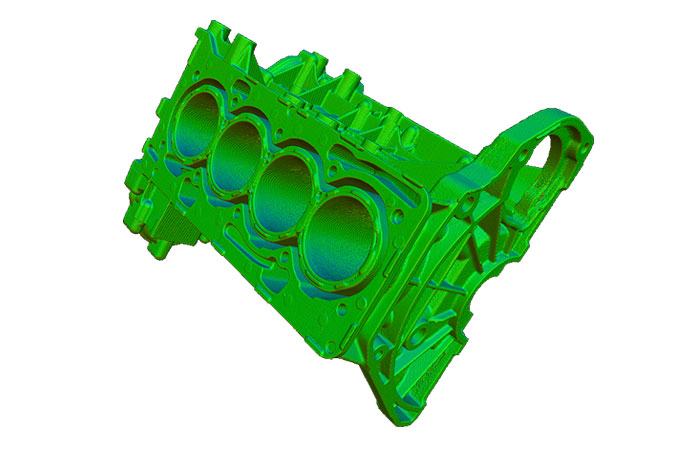
The CT System diondo d4 is ideally suited for measuring and testing of medium-sized to large components with high density such as:- Cylinder heads Engine housings and gearboxes Steel and cast iron Aluminum and steel components Electric motors Pistons
Specifications
X-Ray Source 450 / 600 [kV] Detector Flat Panel Detector
3.000 x 3.000 px, 139 [µm]Line Detector
3.070 px, 200 [µm]Scan Volume, maximum à 530 x 820 H [mm] à 670 x 800 H [mm] Focus-Detector-Distance 1350 [mm] Sample Weight 70 [kg] System Dimensions L 2.500 x B 2.500 x H 2.800 [mm] System Weight 15 / 20 [t] diControl Features DR-Function, di Scatter, Scan Enhancement, Multiline CT, Daily Check, Health Monitor, Helix CT, Batch Mode, Offset CT, Limited Angle CT Manipulation granite based, 4 / 5 axes,
diondo d5 Multifunctional & Freely Configurable CT System


Multifunctional computed tomography system
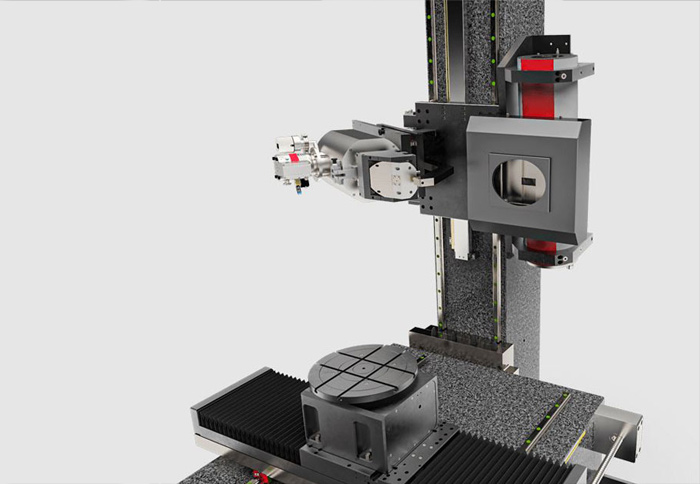
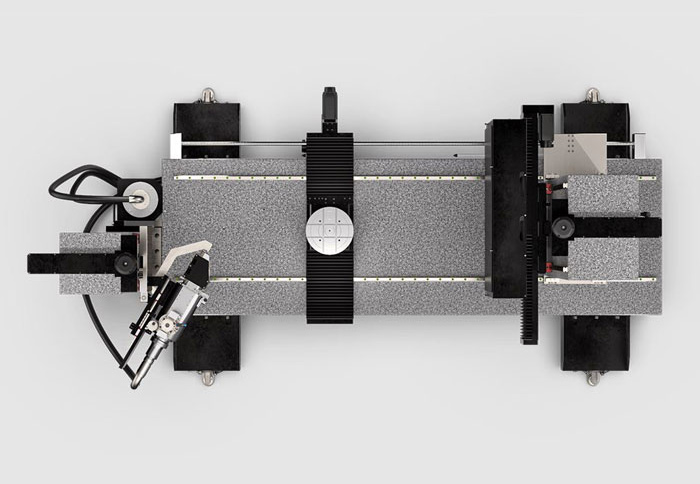
- The multifunctional computed tomography system diondo d5 is designed for all customers, who do not wish to compromise in terms of performance, size and equipment. The wide range of high-performance x-ray sources and high-resolution detectors combined with an adaptable precision manipulator with up to 9 axes constitutes an innovative leap in terms of flexibility and performance.
Features- A Multitude of Combinations to suit your specific testing requirements with up to two tubes & two detector variants
- Innovative Software Package for optional test methods, e.g. Helix CT, diScatter, diPlanar
- Coordinate Measuring Technology Reproducible 3D measurement technology for highest demands in accordance with VDI/VDE 2630-1.3
- Granite Manipulator with up to 9 motorized axes for maximum flexibility
- in situ Enhancements individual solutions for scientific analyses under test conditions
di Scatter
- Top level automated scattered
radiation correction
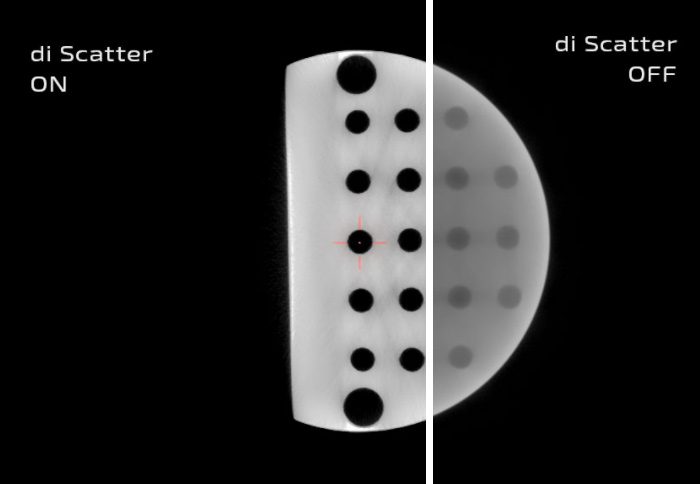
Especially in CT systems in the area of >300 kV scattered radiation causes a significant impairment of the image quality. In the case of line detectors, this effect is avoided by a strong pre-collimation. Yet this is at the expense of measurement time, since only a small layer of the test object can be tomographed during one revolution of the object. In terms of measuring time, flat panel detectors are clearly superior to due to their large surface. Because of the lack of collimation the scatter has its unrestricted impact and complicates or even prevents a reliable detection of defects.
diScatter is capable of compensating this impairment almost completely. After carrying out a fully automatic calibration, entire measurement series of structurally identical and similar test objects can be tomographed in high image quality and in very short time.
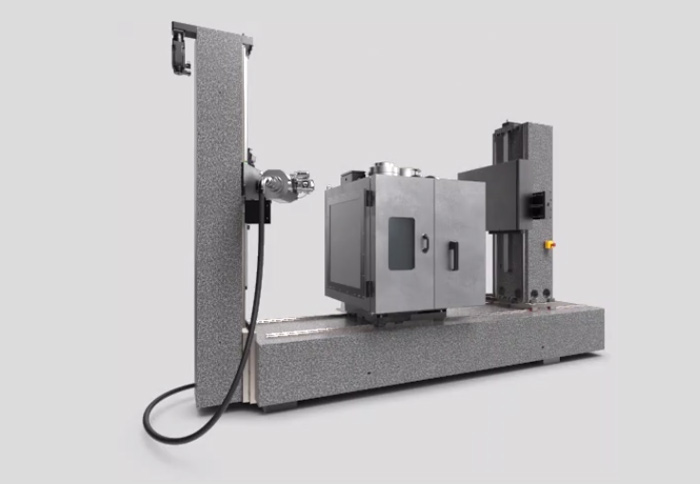
in situ Computed Tomography
- Dimensional Measurement & Material Testing
Under Specific Test Conditions
The diondo5 system can be equipped with additional functional modules, e.g. in order to apply close-to-reality conditions such as mechanical, thermal or chemical stress onto the sample - and to observe the impact in the CT. Among these are tensile and pressure testing machines, multiaxial tire constraining units, climate chambers, etc.
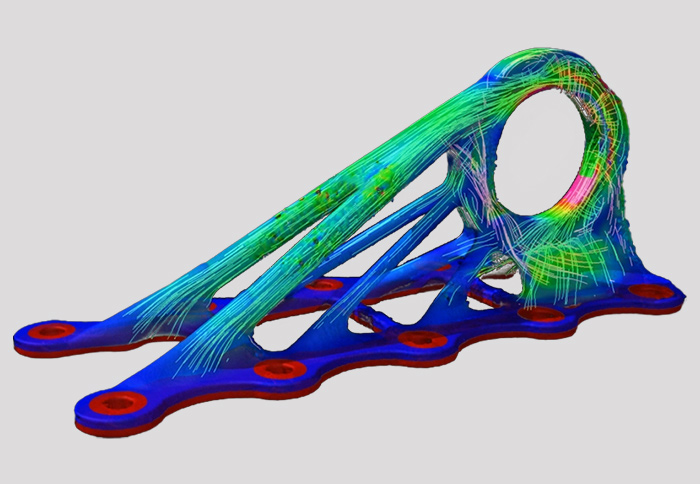
Applications
- Nothing remains hidden for these test methods
The range of applications includes everything from complex measurements of tiny components up to classical non-destructive testing of voluminous objects. The diondo d5 is used for measuring and analyzing very different test parts and materials such as:- Cylinder heads, gearboxes
- Cast parts made from steel, aluminum
- Additively manufactured parts Injection-molded plastic parts
- Geological samples
- Mechatronic components
- Fiber composites
- Metal alloy components
- and much more.
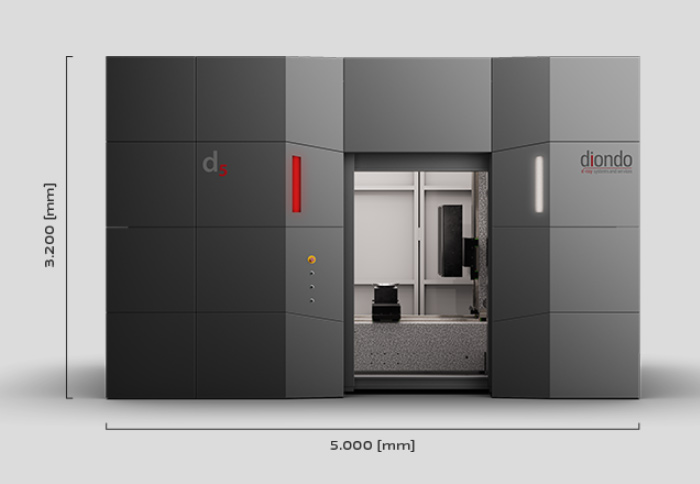
Specifications
Micro Focus Tube 240 / 300 [kV] Mini Focus Tube 450 / 600 [kV] Detector Flat Panel Detector
3.000 x 3.000 px, 139 [µm]Line Detector
4.100 px, 200 [µm]Focus-Detector-Distance, Micro Focus Tube 500-1950 [mm] Focus-Detector-Distance, Mini Focus Tube 850-2400 [mm] 800-2100 [mm] Scan Volume à 350 x 320 H [mm] à 500 x 1300 H [mm] Scan Volume, maximum à 700 x 1300 H [mm] à 850 x 1300 H [mm] Sample Weight 100 [kg] System Dimensions L 5.000 x B 2.900 x H 3.200 [mm] System Weight 40 [t] diControl Features DR-Function, di Scatter, Scan Enhancement, Multiline CT, Daily Check, Health Monitor, Helix CT, Batch Mode, Offset CT, Limited Angle CT, di Planar Radiation Protection Steel-Lead-Cabinet / Radiation-Shielded Area [Concrete] Manipulation granite based, 7 / 8 axes,
diondo d7 High-Performance Linear Accelerator CT System for Analyzing & Testing of High-Density Components
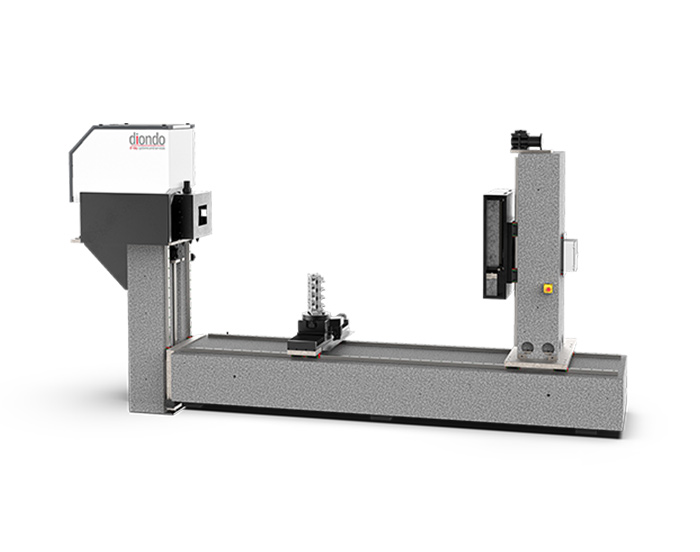
The most powerful CT system of the product family
- The linear accelerator CT system diondo d7 is the most powerful CT system of the product family and suited for analyses of high-density components (engine, crankcases, stators, turbine blades, etc.) from titanium, copper, steel or thick-walled aluminum. The focus of the application of such powerful CT systems are predominantly component analyses to detect any manufacturing or material defects, as well as the review of shape and wall thickness of the test objects.
Features- Linac
Performance classes 3 MeV, 6 MeV and 9 MeV,
infinitely adjustable work areas - Manipulator
Adapted to customer requirements and available in different sizes - Flat Panel Detector
High-resolution (140 µm) flat panel
detector optimized for Linac CT - Line Detector
High-resolution (200 µm) Line Detector
optimized for Linac-CT
- Linac
Why Linac CT?
-
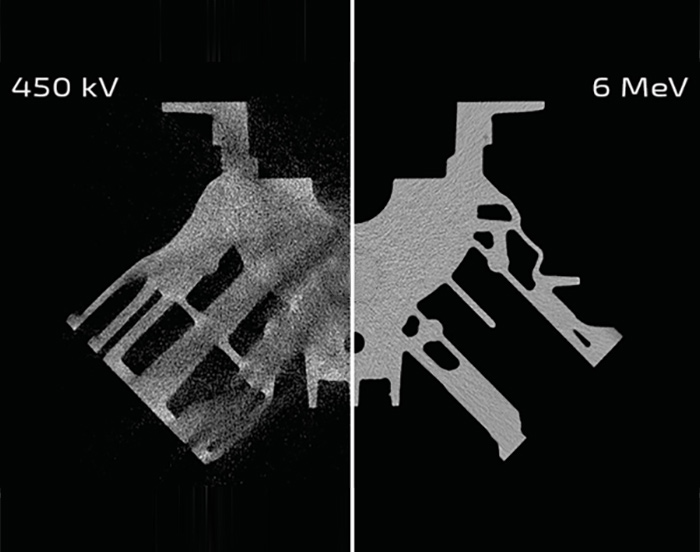
Comparison between 450 kV and 6 MeV
450 kV
Due to the immense material thickness a reliable defect detection is not possible6 MeV
Thanks to the high penetration power not only the measurement time is drastically reduced, but also the test result allows a reliable defect analysis.
Additionally, the excellent contrast values and clear object outlines allow measurement analyses.
Unique 1 kHz Pulse Rate
-
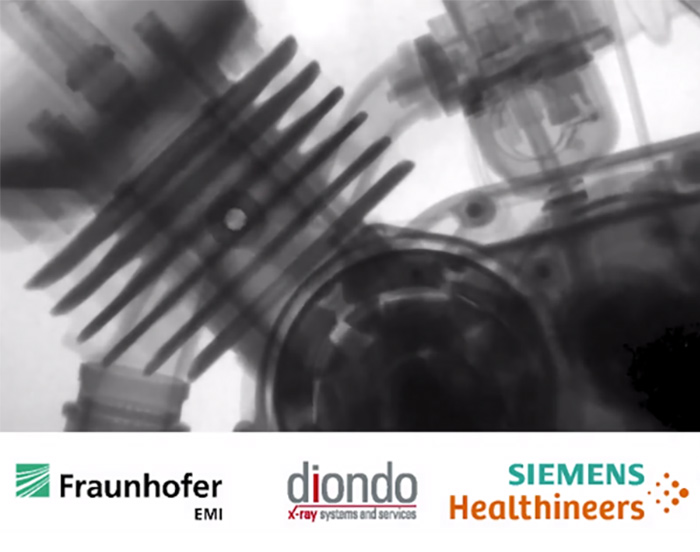
High-speed DR analyses
Due to the extremely high pulse rate and penetration power new fields of application open up.
High-speed recordings, for example, of running motors, triggering airbags and combusting fuels are possible in combination with special detectors.
In cooperation with Siemens and the Fraunhofer Institute for short-term dynamics various experimental setups have been implemented successfully.
Applications
-
Nothing remains hidden for these test methods
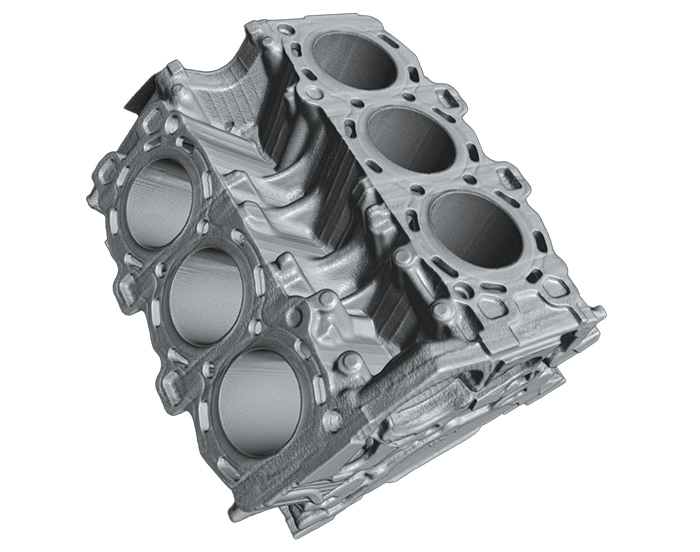
The range of applications includes everything from complex measurements of tiny components up to classical non-destructive testing of voluminous objects. The diondo d7 is used for measuring and analyzing very diverse test parts and materials such as:
- Electric mobility: rotors, strators,...
- Automotive: engine blocks, cylinder heads,...
- Energy: turbine blades,...
- Air & Aerospace: power unit components,...
- Mechanical engineering: high-alloy steels, cast-iron components, ...
diondo d! Special solutions: X-ray and CT Systems for individual applications
- Due to the 25-years of experience in the field of industrial computed tomography, diondo has established itself as market leader in the field of innovative special solutions and customer-specific test systems. This does not only refer to the dimensions of the testing system, the x-ray source(s) and detector(s), but also to specific sequences of movements and analysis algorithms. Thanks to a continuously growing choice of function modules even large and complex computed tomography systems can be developed and produced in short time and with manageable development effort.
Offshore - Inspection System For Drilling Cores
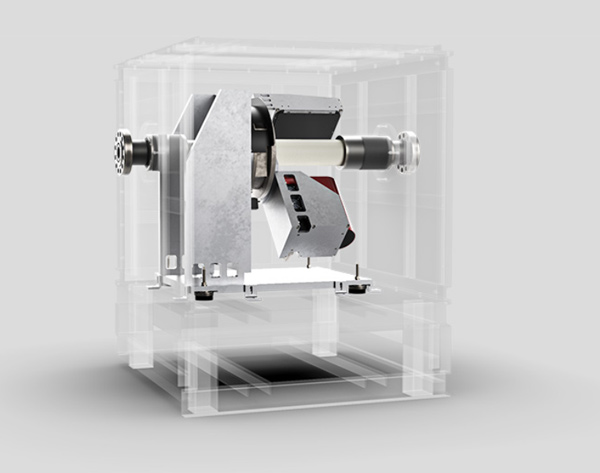
- Inspection systems for drilling cores or tubes are known on the market [mainly as DR systems]. But are these standard solutions still suitable, if the environmental conditions become particularly demanding? The CT System diondo dcore has been developed for the oil and gas industry, in order to be operated on the open sea. The solution takes into account salty air and fluctuating temperatures as well as vibrations [ship propulsion] and shocks [waves]. The system can be used either in a manual inspection mode or in an inline inspection mode and can also be adapted, for example, to the testing of fuel rods and cylindrical test objects in general.
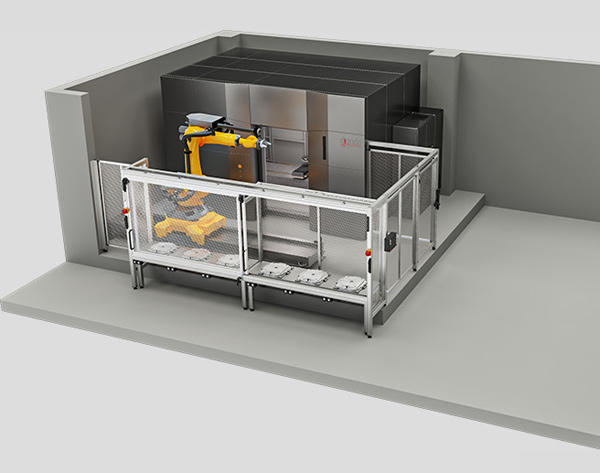
24/7 Inline CT Systems Quality Control of Series Production
-
The combination of industrial robots, individual loading systems and a high-performance CT System can ensure the fully automated quality inspection of series production.
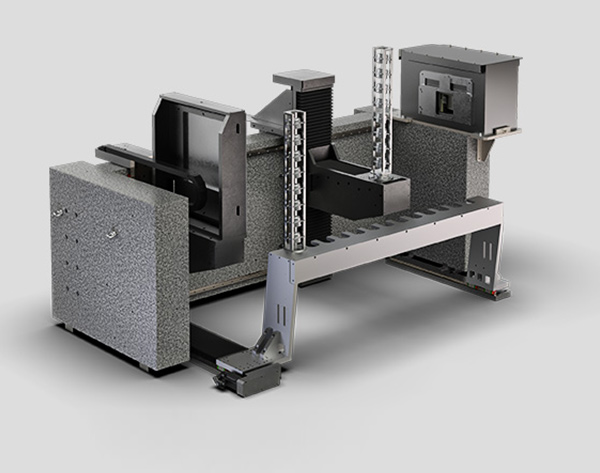
Laboratory CT System Semi-Automatic Parts Inspection
-
In addition to classical research and development, CT systems are increasingly used for the testing of smaller series such as customer complaints, production peaks, batch testing, etc.
For a client in the automotive sector, a CT System has been configured, which can be used for the measurement of individual components [manually] as well as complete small series [semi automatically].
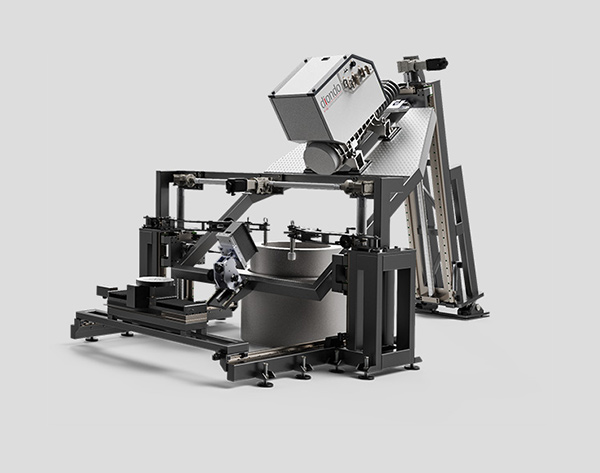
Highest penetration power for large inspection parts
- Using our existing kits of components and function modules, a unique and complete new CT/DR solution has been developed. The 9 MeV System can penetrate more than 100 mm of Cu or 200 mm of Steel with second to none image quality. A tilt support allows a single-walled DR analysis, while the horizontal position is used for the CT. Due to the fact that test parts may be several meters long and weigh several tons, the radiation protection is split into several floors, with the CT system being located on the upper level.
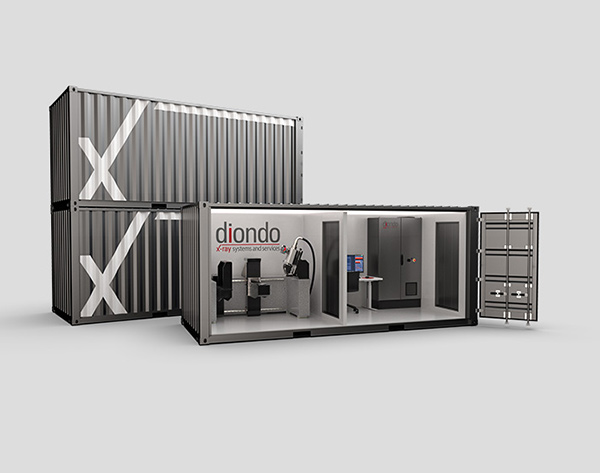
Mobile CT Site-Independent Inspection Capacity
- 3D Micro-CT examinations with extremely high precision by a 240 kV Micro Focus X-ray source, 3K area detector and granite manipulator for electronics, light metals and plastics. You can analyze test objects of up to 800 mm in diameter and a height of 2000 mm.
CT Inspection Service

-
Non-destructive examination of all details by means of 2D radioscopy & 3D computed tomography
In addition to the development and construction of industrial computed tomography and x-ray systems diondo also offers a wide range of non-destructive testing services (CT Services). Our many years of experience make diondo your strong partner for the implementation of your quality objectives. Since only one CT System alone cannot analyze and measure the entire range of different test parts effectively, our machine park also includes the whole range of services from Micro-CT to Linac CT. This allows us to always ensure the best possible price-performance ratio.
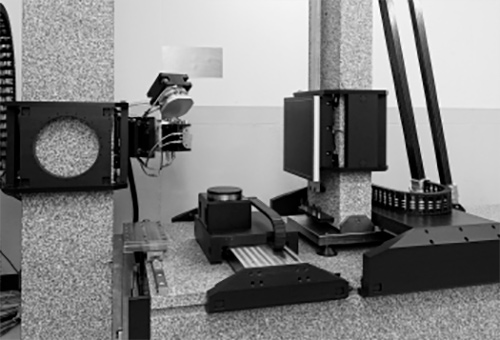
Micro-CT
- 3D Micro-CT examinations with extremely high precision by a 240 kV Micro Focus X-ray source, 3K area detector and granite manipulator for electronics, light metals and plastics. You can analyze test objects of up to 800 mm in diameter and a height of 2000 mm.
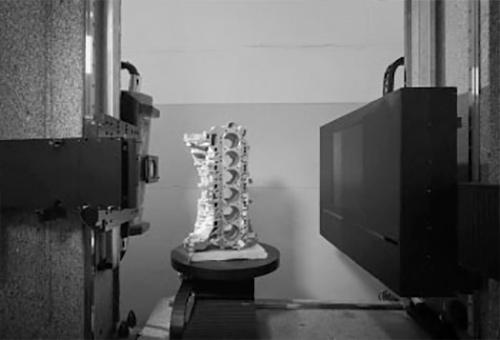
High-energy CT
- Flexible combination of a 450 kV X-ray source with a 3K area detector and a 4K Line detector to effectively test dense materials or larger components of up to 5000 mm of height and 1000 mm in diameter.
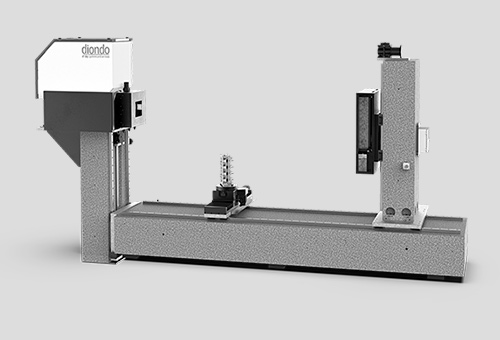
Linac CT
- Due to the high dose rate the Linac CT is perfectly suited for analyzing test parts with very high density.