Piston ring inspections at PSA with laser displacement sensors by KEYENCE
Automatic piston ring inspections carried out at PSA with laser displacement sensors by KEYNECE.

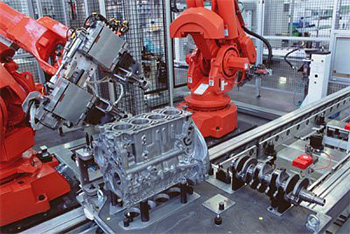
The Trémery factory prduced 6,500 diesel engines a day
Photo by Keyence
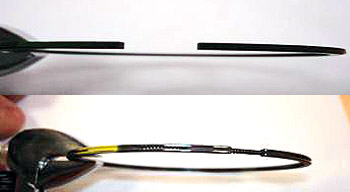
The piston rings are fitted by a robot. The rings feature a gap and when they are expanded, they slide into grooves which have been created into the piston to house them. The pistons are critical components whose main purpose is to prevent combustion gases from escaping into the engine crankcase, so as to avoid loss of gas pressure and engine power. They also help to keep the engine´s lubricating oil out of the combustion chamber, while leaving a lubricating film of a predetermined thickness over the full surface area of the cylinder walls. Correct fitting of these moving sealing parts is essential to keep the engine running efficiently.

Photo by Keyence
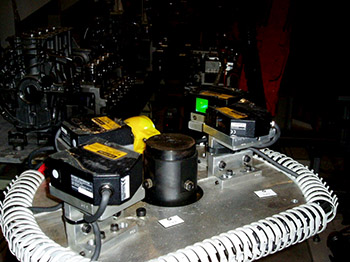
Pistons are fitted with 3 rings: the scraper ring, which is the most critical in regards to inspection because it is very thin and has a small spring that breaks easily, the compression ring, and lastly the top or “fire” ring that is 3 mm high and is the easiest to inspect. The piston rings are checked automatically at the Trémery PSA factory. A robot places the piston on a turntable, and four sensors are located on each side of the piston, opposite the first two rings. Each sensor inspects half of a ring. An initial rotation through 180° is made to check the first two rings with the 4 sensors. The turntable then rises along the Z axis. A second rotation is made in the opposite direction to inspect the third ring, using 2 sensors. If a ring is found to be nonconforming, it is inspected again, and then a third time. If the defect is confirmed, the piston is sent to an operator for further analysis.
“The displacement sensors measure all the dimensions of each of the half-perimeters that they are analysing. About 2,500 measurements are made per full turn, giving a pitch of less than one tenth of a millimetre. An inspection cycle of the 3 rings takes about 5 seconds.
¨We have determined thresholds to check the presence and the position of the 3 rings in the middle of the groove, together with the size and position of the gap. We also check the spring on the scraper ring via its gaps. To do so, we have selected the Keyence LK-G32 high-precision model with a small, 30-micron spot, as otherwise the spot was too big to enter the gaps”, explains Claude Tritz, an assembly maintenance technician at the Trémery PSA factory.

Two LK-G models are used: 2 heads with small spots 30 microns in diameter (LK-G32) to inspect the scraper and compression rings, and 2 LK-G82 heads to detect the top ring.
Photo by Keyence
The LKG laser displacement sensors provide a sampling speed of 50 kHz with a repeatability level of 0.05 μm for the most accurate models. Piston rings are reflective parts, and this affects the measurements. The LK-G range enables stable detection of transparent plastic and metal objects, thanks to its correction functions. The ABLE (Active Balanced Laser control Engine) technology detects the surface of a target and adjusts the laser light intensity to the optimum level. ABLE intelligently controls three parameters: laser emission time, laser power level, and gain (CCD amplification factor), thus providing a wide range of light intensity adjustment that is up to 90 times greater than that of conventional models. The MRC (Multiple Reflection Cancel) algorithm enables elimination of multiple reflections from a metal surface. When at least two peaks are generated by multiple reflections, the algorithm compares the wave forms with the last light wave form received and determines which one shows the greatest similarity with the “correct wave form”
“We have been using this solution for years now; in comparison to the previous solution, we have considerably reduced the numbers of false defects. It is to be noted that 3,000 engines are assembled on a continuous basis every day on the lines inspected by the LK-G sensors, in a very difficult environment. Nonetheless, the LK-G sensors stand up to the conditions very well”, concludes Claude Tritz.
For further information visit: www.keyence.com
News Categories
- » NEWS HOME
- » Automation & Robotics
- » Industry 4.0
- » Material Handling
- » Sensors
- » Quality & Testing
- » Machine Vision
- » Laser & Optics
- » Metalworking
- » Motion Control & Drives
- » Hydraulics & Pneumatics
- » Process Industry
- » Renewable Energy
- » Agriculture
- » Home & Office Furniture
- » Environmental Tech

